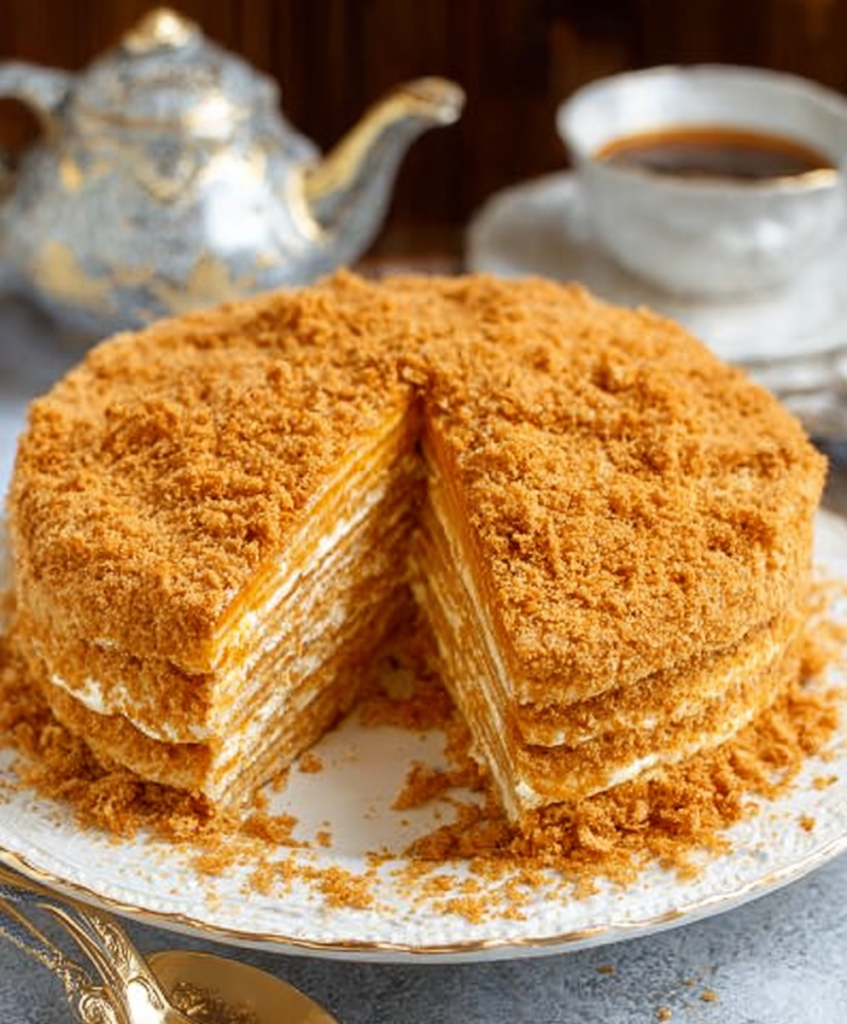
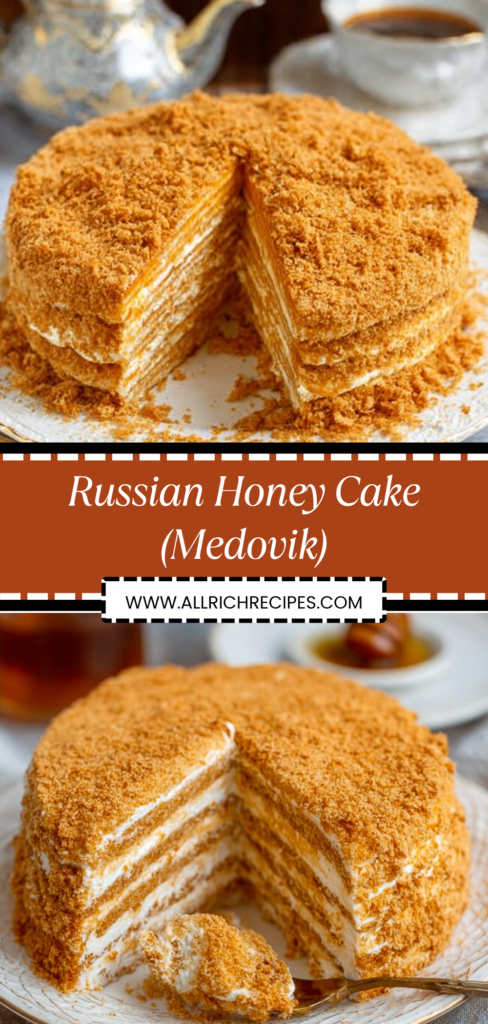
There’s a moment when you first taste authentic Medovik that everything you thought you knew about cake shifts. This isn’t just dessert—it’s edible architecture, a testament to patience, and proof that simple ingredients can create extraordinary things. Eight paper-thin layers of honey-kissed cake alternate with clouds of sour cream frosting, transforming overnight into something that defies description: simultaneously crisp and tender, sweet and tangy, rustic and refined.
Ingredients
For the Honey Cake Layers:
- 3 tablespoons honey
- ½ cup granulated sugar
- 5 tablespoons unsalted butter
- 3 large eggs
- 1 teaspoon baking soda
- 3½ cups all-purpose flour, sifted
- ½ teaspoon salt
- 1 teaspoon vanilla extract
For the Sour Cream Frosting:
- 3 cups sour cream (full-fat, not light)
- 1½ cups heavy whipping cream
- 1 cup powdered sugar, sifted
- 1 teaspoon vanilla extract
For Assembly and Decoration:
- Reserved cake crumbs from trimming
- 2 tablespoons honey for brushing (optional)
- Fresh berries or honeycomb for garnish (optional)
Instructions
- Create the Honey Mixture: In a medium saucepan, combine honey, sugar, and butter. Place over medium heat, stirring constantly until sugar dissolves. Continue cooking for 2-3 minutes until mixture turns a shade darker and smells deeply caramelized.
- Prepare the Bain-Marie: Remove from direct heat and place saucepan over a pot of simmering water (double boiler). Whisk in eggs one at a time, beating constantly for 5-7 minutes until mixture doubles in volume and becomes pale and fluffy.
- Add Baking Soda: Sprinkle baking soda over the mixture while whisking. It will foam dramatically—this is correct. Continue whisking for another minute until foam subsides slightly. Remove from heat and add vanilla.
- Form the Dough: Gradually sift in flour and salt, stirring with a wooden spoon until dough comes together. It will be soft and slightly sticky. Divide into 8 equal portions (about 100g each if weighing).
- Roll the Layers: On parchment paper, roll each portion into a thin circle, about 9 inches in diameter and 2-3mm thick. Don’t worry about perfect circles—rustic charm is part of Medovik’s appeal. Keep remaining portions covered to prevent drying.
- Bake the Layers: Preheat oven to 350°F. Slide parchment with rolled dough onto baking sheet. Bake for 5-7 minutes until golden brown. The layers will bubble and look uneven—this is normal. Remove and immediately cut into perfect circles using a plate as guide while still warm. Save all scraps.
- Prepare the Frosting: Whip heavy cream to soft peaks. In separate bowl, whisk sour cream, powdered sugar, and vanilla until smooth. Gently fold whipped cream into sour cream mixture in three additions, maintaining light texture.
- Begin Assembly: Place first layer on serving plate. Spread ⅔ cup frosting evenly to edges. Repeat with remaining layers, pressing gently to adhere. Cover top and sides with remaining frosting.
- Create the Crumb Coating: Pulse reserved cake scraps in food processor until fine crumbs form. Press crumbs onto sides and top of cake, covering completely. This signature coating adds texture and prevents drying.
- The Critical Rest: Cover loosely and refrigerate for at least 8 hours, preferably 24. This isn’t optional—the transformation during this time is what makes Medovik magical.
Recipe Notes
- Prep Time: 1 hour
- Bake Time: 1 hour (for all layers)
- Assembly Time: 30 minutes
- Resting Time: 8-24 hours
- Total Time: 2.5 hours active, plus overnight rest
- Servings: 12
- Calories: 420 per slice
The Science of Medovik’s Magic
The alchemy of Medovik begins with that unusual cooking method—creating what Russians call “заварное тесто” (zavarnoe testo), or brewed dough. By cooking honey, sugar, and butter together, we’re creating complex caramelized flavors that raw honey could never achieve. The Maillard reaction between amino acids and sugars develops hundreds of flavor compounds, giving depth that makes people ask, “What IS that amazing taste?”
Adding eggs over the double boiler serves multiple purposes. The gentle heat partially cooks the eggs, creating a stable foam that lightens the traditionally dense dough. This technique, similar to making sabayon or Swiss meringue, incorporates air that would be impossible to achieve through regular mixing.
That dramatic foaming when baking soda hits the warm mixture isn’t just theater—it’s chemistry. The alkaline baking soda reacts with honey’s natural acidity, creating CO2 bubbles that lighten the dough. It also raises the pH, accelerating Maillard reactions during baking for deeper flavor and color.
Mastering the Layers
The secret to professional-looking Medovik lies in understanding that perfection isn’t the goal—consistency is. Each layer should be uniformly thin (2-3mm), but they needn’t be geometrically perfect. In fact, slight irregularities add to the cake’s handmade charm.
Rolling technique matters more than you’d think. Always roll from center outward, rotating the dough quarter-turns to maintain even thickness. The dough will be soft and may stick—dust your rolling pin with flour, not the dough itself, to prevent incorporating too much flour which toughens layers.
Why parchment paper is non-negotiable: The dough is too delicate to transfer otherwise. Rolling directly on parchment means you can slide it straight onto your baking sheet. Plus, the paper prevents sticking as the high sugar content makes these layers prone to caramelizing on the bottom.
Timing is everything when cutting circles from hot layers. Too early and they’re too soft, tearing instead of cutting cleanly. Too late and they become brittle, shattering rather than slicing. That 30-second window when they’re firm but pliable is your target.
The Frosting Formula
Traditional Medovik uses только сметана (only sour cream), but modern versions incorporate whipped cream for lighter texture. The ratio matters: too much cream and you lose that characteristic tang; too little and the frosting becomes heavy. Our 1:2 cream-to-sour-cream ratio hits the sweet spot.
Full-fat sour cream is non-negotiable. Reduced-fat versions contain stabilizers that prevent proper incorporation with whipped cream, resulting in a grainy, separated mess. The fat content also affects how the frosting absorbs into layers during the crucial resting period.
Temperature control during frosting preparation prevents disaster. Over-whipped cream turns to butter; under-whipped won’t provide structure. Fold components together gently—vigorous stirring deflates the carefully incorporated air. The finished frosting should be light enough to spread easily but stable enough to hold its shape.
Assembly Architecture
Think of assembly as building with edible mortar. Each frosting layer needs complete coverage to the very edges—gaps create dry spots that won’t soften properly during resting. Use an offset spatula, working from center outward in smooth strokes.
Don’t press layers too firmly. Gentle pressure ensures adherence without squeezing out frosting. The weight of accumulating layers provides sufficient compression. You’re creating a structure that needs to breathe and absorb moisture evenly.
That crumb coating isn’t mere decoration—it’s functional. The fine crumbs absorb excess moisture from the frosting, preventing sogginess while adding textural contrast. They also protect the delicate outer frosting layer from drying out during storage.
The Transformation Time
The 24-hour rest isn’t chef pretension—it’s physical necessity. During this time, moisture from the frosting migrates into the crisp honey layers, softening them to cake-like tenderness. Meanwhile, the layers release honey flavor into the cream, creating flavor marriage impossible to achieve any other way.
What happens hour by hour: At 4 hours, edges begin softening. By 8 hours, layers are tender but distinct. At 12 hours, the texture becomes cohesive. By 24 hours, you can’t tell where cake ends and frosting begins—except for delightful textural variation that makes each bite interesting.
Temperature during resting affects the transformation. Too cold and moisture migration slows; too warm and the frosting breaks down. Standard refrigerator temperature (35-38°F) is ideal. Cover loosely—airtight wrapping traps moisture, making the coating soggy.
Troubleshooting Common Medovik Mishaps
“My layers are thick and bready”: Either under-rolled or too much flour incorporated. Next time, roll thinner and use minimal flour. The dough should be almost translucent when properly rolled.
“Layers burn before cooking through”: Oven too hot or rack position too high. Use an oven thermometer to verify temperature. Middle rack position ensures even baking. Dark baking sheets absorb more heat—use light-colored ones or double-pan.
“Frosting is runny”: Over-whipped cream or warm ingredients. Start over with cold cream and bowl. Whip just to soft peaks—they should bend over when beater is lifted, not stand straight.
“Cake didn’t soften after resting”: Insufficient frosting between layers or environment too dry. Be generous with frosting and ensure complete coverage. If your refrigerator runs dry, place a damp paper towel in the container (not touching cake).
“Honey flavor too strong/not enough”: Honey quality matters enormously. Mild clover honey provides subtle sweetness; buckwheat honey delivers robust flavor. Adjust to preference, remembering flavor intensifies during resting.
Regional Variations and Modern Twists
Classic Soviet Style: Uses only sour cream, no whipped cream. Layers often include crushed walnuts. Sometimes condensed milk replaces some sugar for deeper sweetness.
Prague Style: Adds cocoa powder to half the layers, creating striking stripes. Chocolate shavings replace crumb coating.
Modern Fusion: Incorporates mascarpone into frosting for Italian influence. Layers might include spices like cardamom or orange zest. Some add layer of dulce de leche between sections.
Seasonal Adaptations: Summer versions feature berry compotes between layers. Autumn might include apple butter. Winter editions incorporate warming spices.
Mini Medoviks: Individual portions using 3-inch rounds. Perfect for elegant plating. Assembly remains identical, just scaled down.
The Cultural Story
Medovik’s history intertwines with Russian culture itself. Legend credits its creation to a young baker in Emperor Alexander I’s kitchen who didn’t know the Empress despised honey. His creation changed her mind, becoming the royal court’s favorite dessert.
During Soviet times, when ingredients were scarce, Medovik represented celebration. Honey was more available than sugar, making this cake possible when others weren’t. Families guarded their recipes, each claiming theirs was настоящий (the real one).
Today’s Medovik bridges generations. Grandmothers teach Soviet techniques while granddaughters experiment with modern flavors. It appears at New Year celebrations, birthdays, and weddings—always signifying something special worth waiting for.
Professional Presentation
Decoration Options:
- Pipe rosettes around edges using reserved frosting
- Arrange honeycomb pieces for textural interest
- Dust with cocoa powder through doily for patterns
- Fresh berries provide color contrast
- Edible flowers for elegant occasions
Slicing Strategy: Use a hot, dry knife for clean cuts. Wipe between slices. The layers should be visible but cohesive. Serve slightly chilled for best texture—remove from refrigerator 10 minutes before serving.
Plating Ideas: Drizzle plates with honey reduction. Add quenelle of honeyed whipped cream. Garnish with bee pollen or gold leaf for special occasions. Fresh mint provides color and palate cleansing.
Storage Mastery
Properly stored Medovik improves for up to 5 days. Keep covered in refrigerator, but not airtight. The texture continues evolving—day 3 often considered peak. Freezing is possible but changes texture slightly. Wrap individual slices for convenient serving.
Never leave at room temperature over 2 hours—the dairy-based frosting requires refrigeration. For events, display your showpiece briefly, then return to cooling.
Final Thoughts
Medovik represents more than dessert—it’s a meditation on transformation. Simple ingredients become extraordinary through technique and time. The process can’t be rushed, teaching patience in our instant world. When you finally taste that first piece, understanding dawns: some things are worth waiting for. This cake, with its whisper-thin layers and cloud-like cream, reminds us that the best recipes aren’t just about feeding bodies—they’re about creating memories, honoring traditions, and sharing love, one carefully crafted layer at a time.