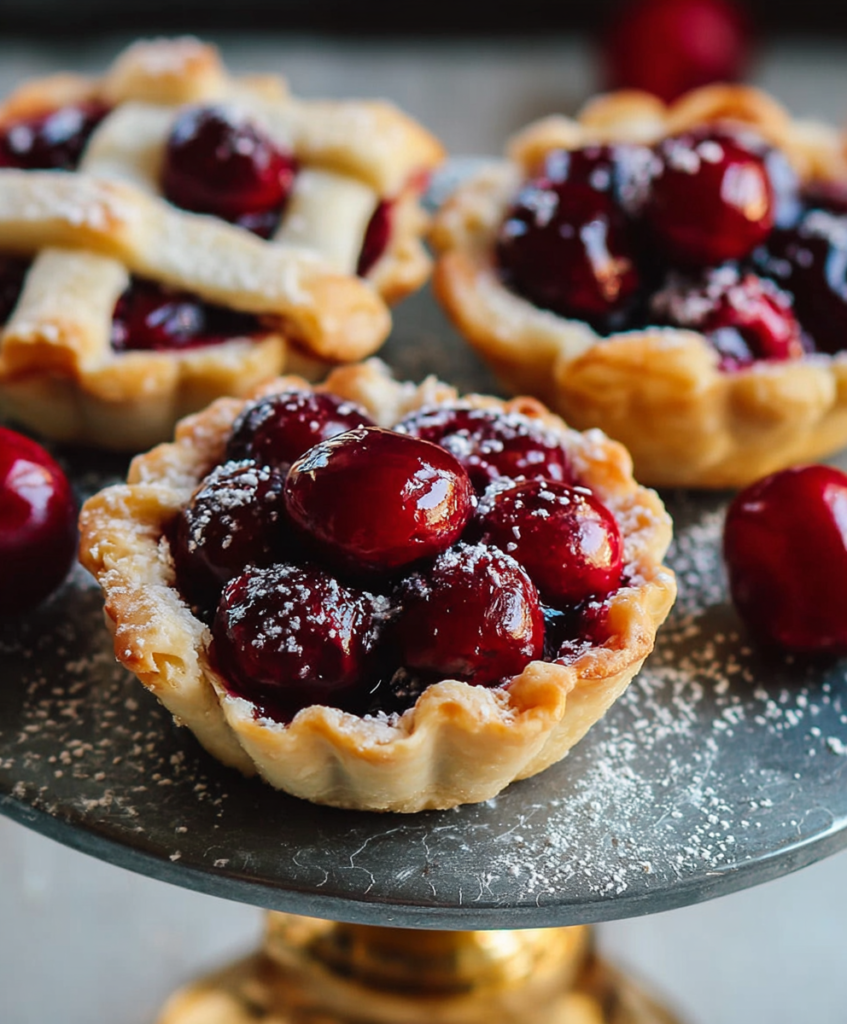
These are the pies that make people gasp with delight—perfectly portioned handheld treasures with buttery, flaky crust cradling ruby-red cherries that burst with sweet-tart flavor. Each mini pie is a masterpiece of pastry architecture, with crimped edges or lattice tops that would make your grandmother proud. They’re what happens when classic American pie meets modern convenience, creating individual servings that eliminate the politics of slice size while maximizing the coveted crust-to-filling ratio.
Ingredients
For the All-Butter Pie Crust:
- 2½ cups all-purpose flour, plus more for dusting
- 1 tablespoon granulated sugar
- 1 teaspoon salt
- 1 cup (2 sticks) unsalted butter, cold and cubed
- ¼ to ½ cup ice water
- 1 tablespoon apple cider vinegar
For the Cherry Filling:
- 4 cups fresh or frozen cherries, pitted (about 2 pounds)
- ¾ cup granulated sugar
- 3 tablespoons cornstarch
- 1 tablespoon fresh lemon juice
- 1 teaspoon vanilla extract
- ½ teaspoon almond extract
- ¼ teaspoon salt
- Pinch of cinnamon
- 2 tablespoons unsalted butter, cut into small pieces
For Assembly:
- 1 egg, beaten (for egg wash)
- 2 tablespoons coarse sugar (sanding or pearl sugar)
- 12-cup muffin tin or mini pie pans
Instructions
- Make the Pie Dough: In a large bowl, whisk flour, sugar, and salt. Add cold butter cubes and use pastry cutter or two knives to cut butter into flour until mixture resembles coarse breadcrumbs with some pea-sized pieces. This takes 3-4 minutes of patient cutting.
- Add Liquid: Combine ¼ cup ice water with vinegar. Drizzle over flour mixture while gently stirring with a fork. Add more water, 1 tablespoon at a time, until dough just comes together when squeezed. It should be shaggy, not wet.
- Form and Chill: Divide dough in half, shape into discs, wrap in plastic, and refrigerate at least 2 hours or up to 3 days. This rest period hydrates flour and relaxes gluten for tender, flaky crust.
- Prepare Cherry Filling: If using fresh cherries, pit them over a bowl to catch juices. In a large bowl, combine cherries with sugar, cornstarch, lemon juice, both extracts, salt, and cinnamon. Let macerate for 15 minutes, stirring occasionally.
- Roll Bottom Crusts: On floured surface, roll one dough disc to ⅛-inch thickness. Cut circles about 1 inch larger than your muffin cups (typically 4-4½ inches). Gently press circles into muffin tin, leaving overhang.
- Fill the Pies: Divide cherry mixture among crusts, about ¼ cup per pie. Dot each with butter pieces. The filling will seem generous—it cooks down. Reserve any accumulated juices.
- Create Top Crusts: Roll second disc and cut 3-inch circles for full tops, or cut strips for lattice. For lattice, weave 4-6 strips per pie. Seal edges by pressing together, then crimp decoratively with fork or fingers.
- Finishing Touches: Brush tops with egg wash, sprinkle with coarse sugar. Cut small vents in full tops for steam escape. Freeze pies for 20 minutes—this helps maintain shape during baking.
- Bake to Golden: Preheat oven to 425°F. Bake on lower rack for 15 minutes, then reduce to 375°F and bake 20-25 minutes more until crust is golden and filling bubbles through vents. Cool in pan 10 minutes before removing.
- Cool and Serve: Transfer to wire rack and cool at least 30 minutes before serving. The filling needs time to set properly. Serve warm or at room temperature.
Recipe Notes
- Prep Time: 45 minutes (plus chilling)
- Chilling Time: 2 hours minimum
- Bake Time: 35-40 minutes
- Total Time: 3 hours 30 minutes
- Yield: 12 mini pies
- Calories: 285 per mini pie
The Science of Perfect Pie Crust
Creating flaky pie crust is pure chemistry. When cold butter pieces are surrounded by flour, they create distinct layers. In the oven’s heat, water in the butter turns to steam, pushing apart these layers to create flakiness. This only works if butter stays cold during mixing—warm butter blends with flour, creating tender but not flaky results.
The vinegar addition isn’t just grandmother’s wisdom—it’s backed by science. Acid inhibits gluten development, keeping crust tender even if slightly overworked. It also helps with browning through the Maillard reaction. Don’t worry about taste; vinegar flavor bakes off completely.
That shaggy, barely-together dough appearance terrifies new bakers, but it’s exactly right. Overworking develops gluten, creating tough crust. The dough continues hydrating during rest time, transforming from crumbly to smooth and pliable. Trust the process—ugly dough makes beautiful crust.
Cherry Selection and Preparation
Cherry variety dramatically impacts your pies. Sour cherries (Montmorency) are the gold standard for baking—their tartness balances the sugar perfectly and they hold their shape. Sweet cherries (Bing, Rainier) work but need lemon juice increased to 2 tablespoons for proper balance.
Fresh versus frozen is a personal choice with surprising results. Frozen cherries are picked at peak ripeness and often have better flavor than out-of-season fresh. They release more juice, so increase cornstarch by 1 tablespoon. Thaw completely and drain, reserving juice for another use.
Pitting cherries efficiently saves sanity. A cherry pitter is ideal, but a paperclip bent into a hook works perfectly. Pit over a bowl to catch precious juices. Wear an apron—cherry juice stains are permanent. For easier cleanup, pit inside a plastic bag.
Mastering Mini Pie Assembly
The muffin tin method revolutionized mini pie making. Standard 12-cup tins create perfect portion sizes. The key is cutting bottom circles large enough to come up the sides without stretching—stretching causes shrinkage during baking. That 4-4½ inch measurement allows proper overhang.
Filling amount requires balance. Underfilled pies look sad and have poor crust-to-filling ratio. Overfilled pies bubble over, making a mess and potentially burning. That ¼ cup measurement is ideal—mound it slightly as cherries cook down significantly.
Crimping isn’t just decorative—it seals the pies preventing leaks. Fork crimping is easiest: press tines around edge at regular intervals. For fancy finger crimping, pinch dough between thumb and index finger while pushing with other index finger from opposite side. Practice on scraps first.
The Art of Lattice Work
Lattice tops transform mini pies from homey to showstopping. Cut strips ¼-inch wide for delicate appearance or ½-inch for rustic look. The weaving seems complicated but follows simple pattern: lay half strips one direction, fold back alternating strips, add perpendicular strip, unfold. Repeat.
For easier handling, create lattice on parchment paper then slide onto pie. Or try the cheat method: lay strips in grid pattern without weaving—still beautiful, much simpler. Twisted strips add elegant dimension: gently twist each strip before laying.
Mini pies allow creative tops beyond lattice. Cookie cutter shapes from dough scraps make charming decorations. Stars for patriotic themes, hearts for Valentine’s, leaves for autumn. Brush with egg wash and they’ll bake golden and beautiful.
Temperature and Timing Mastery
That initial high temperature (425°F) serves crucial purpose—it quickly sets the crust structure and creates steam for flakiness. The reduction to 375°F prevents over-browning while ensuring filling cooks properly. This two-temperature method produces professional results.
Freezing assembled pies for 20 minutes before baking isn’t optional—it’s transformative. Cold fat in the crust creates more distinct layers. Frozen pies hold their shape better, preventing slumping. You can freeze up to a month unbaked for ultimate convenience.
Doneness indicators go beyond color. Look for vigorous bubbling through vents—lazy bubbles mean underdone filling that won’t set. The crust should be deep golden, not just blonde. Bottom crust takes longest; that’s why we bake on lower rack for better bottom heat.
Filling Variations and Flavor Enhancements
Cherry-Almond: Increase almond extract to 1 teaspoon, add ¼ cup sliced almonds to filling. Sprinkle additional almonds on top before baking. The classic pairing elevates both flavors.
Bourbon Cherry: Replace vanilla with 2 tablespoons bourbon. Add ½ teaspoon cinnamon. The alcohol bakes off leaving sophisticated depth. Perfect for adult gatherings.
Cherry-Berry: Use half cherries, half blueberries or raspberries. Reduce sugar slightly as berries are sweeter. Creates beautiful color variations and complex flavor.
Chocolate Cherry: Add ½ cup mini chocolate chips to cooled filling. They’ll melt slightly creating pockets of richness without overwhelming cherry flavor.
Spiced Cherry: Add ½ teaspoon cardamom, ¼ teaspoon nutmeg, and orange zest. Middle Eastern-inspired spicing that makes cherries sing.

Troubleshooting Common Issues
“Soggy Bottom Crust”: The eternal pie problem. Solutions: bake on preheated pizza stone or lowest rack, brush bottom with egg white before filling, or partially blind bake crusts 5 minutes before filling.
“Filling Leaked Out”: Usually from overfilling or poor sealing. Leave ½-inch headspace and ensure edges are well-crimped. Thicker filling (more cornstarch) reduces leaking risk.
“Crust Shrank”: Caused by stretched dough or insufficient resting. Handle dough gently, don’t stretch to fit. Rest shaped pies in fridge 30 minutes before baking.
“Filling Didn’t Set”: Insufficient thickener or underbaking. Cornstarch needs reaching 200°F to activate fully. Those vigorous bubbles indicate proper temperature. Cool completely for firmest set.
“Tops Burned, Bottoms Pale”: Oven rack positioned too high. Use lower third of oven. Cover tops with foil if browning too quickly while bottom finishes.
Make-Ahead Strategies
Mini pies excel at advance preparation. Assembled unbaked pies freeze beautifully up to 3 months. Wrap individually in plastic then foil. Bake directly from frozen, adding 10-15 minutes to bake time.
Dough can be made 3 days ahead refrigerated or 3 months frozen. Thaw overnight in refrigerator. Bring to cool room temperature for easier rolling—too cold and it cracks, too warm and butter melts.
Filling can be prepared 2 days ahead and refrigerated. The flavors actually improve with time. Strain out excess liquid before using if it seems too juicy. Save liquid for cocktails or drizzling over ice cream.
Baked pies keep 3 days at room temperature, a week refrigerated. Refresh in 350°F oven for 5-10 minutes to re-crisp crust. They freeze baked for 3 months—thaw overnight and refresh before serving.
Serving and Presentation
Mini pies shine at every occasion. For elegant service, dust with powdered sugar just before serving. A dollop of vanilla whipped cream or scoop of vanilla ice cream transforms them into restaurant-worthy dessert.
Create a pie bar for parties: offer various toppings like whipped cream, ice cream, caramel sauce, and chopped nuts. Let guests customize. Warm pies slightly for best flavor and texture—30 seconds in microwave or 5 minutes in 350°F oven.
For gifts, wrap individual pies in cellophane tied with ribbon. Pack in boxes with dividers to prevent crushing. Include reheating instructions. They travel better than whole pies and feel more special as individual treats.
Equipment Considerations
While muffin tins work beautifully, mini pie pans (4-inch diameter) create more authentic pie shape with slanted sides. Tart pans with removable bottoms ease serving but require gentler handling. Silicon muffin cups work but don’t conduct heat as well, potentially creating paler crusts.
A marble rolling pin stays cooler, keeping dough at ideal temperature. Offset spatula helps transfer delicate dough circles. Pie weights aren’t necessary for filled pies but helpful if blind baking. A cherry pitter, while not essential, makes prep infinitely easier.
The Cultural Significance
Mini pies represent American ingenuity—taking beloved tradition and adapting for modern life. They solve the eternal pie problems: serving size arguments, transportation difficulties, and the last-slice dilemma. Everyone gets their own complete pie experience.
Individual pies have historical precedent in hand pies and pasties, portable meals for workers. These mini cherry pies elevate that practical concept to special-occasion worthy desserts while maintaining the convenience factor that made hand pies popular.
Final Thoughts
These Mini Cherry Pies prove that good things really do come in small packages. They deliver all the satisfaction of a full pie—flaky crust, perfectly balanced filling, beautiful presentation—in perfectly portioned form. The techniques you master here extend beyond cherry pies to any fruit filling, opening endless seasonal possibilities. Whether served at elegant dinner parties or packed in lunch boxes, these miniature marvels bring joy that far exceeds their small size. Master this recipe and you’ll find yourself with a signature dessert that’s as practical as it is delightful, proving that sometimes the best way to improve a classic is simply to make it mini.