
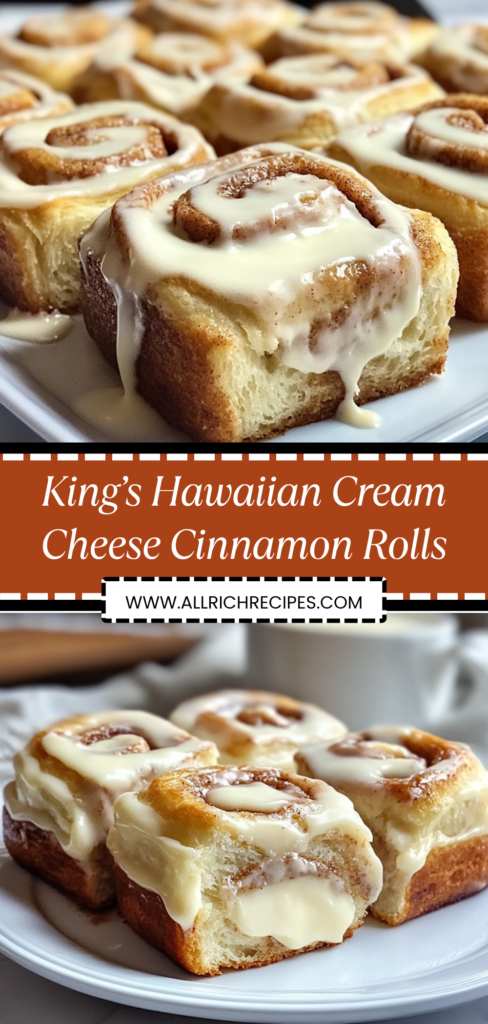
These aren’t your ordinary cinnamon rolls. By incorporating the sweet, buttery essence of King’s Hawaiian bread into classic cinnamon rolls and adding a luxurious cream cheese swirl, we’re creating something that transcends breakfast pastry and enters the realm of pure indulgence. The tropical sweetness of the Hawaiian-style dough paired with warm cinnamon and tangy cream cheese creates a flavor profile that’s both familiar and delightfully unexpected.
Ingredients
For the Hawaiian Sweet Dough:
- 4½ cups bread flour, plus more for dusting
- ⅓ cup granulated sugar
- 2¼ teaspoons instant yeast (1 packet)
- 1½ teaspoons salt
- 6 tablespoons unsalted butter, softened
- ½ cup pineapple juice, warmed to 110°F
- ½ cup whole milk, warmed to 110°F
- 2 large eggs, room temperature
- 1 tablespoon honey
- 1 teaspoon vanilla extract
For the Cream Cheese Filling:
- 8 ounces cream cheese, softened
- ½ cup unsalted butter, softened
- 1 cup light brown sugar, packed
- 2 tablespoons ground cinnamon
- ½ teaspoon ground nutmeg
- ¼ teaspoon salt
- 1 teaspoon vanilla extract
For the Glaze:
- 4 ounces cream cheese, softened
- 4 tablespoons butter, softened
- 2 cups powdered sugar
- ¼ cup heavy cream or milk
- 1 teaspoon vanilla extract
- Pinch of salt
Instructions
- Create the Hawaiian Dough: In a large mixing bowl or stand mixer, whisk together flour, sugar, yeast, and salt. In a separate bowl, combine warmed pineapple juice, milk, eggs, honey, and vanilla. Add wet ingredients to dry ingredients along with softened butter. Mix on low speed until dough comes together, then increase to medium speed and knead for 8-10 minutes until smooth and elastic.
- First Rise: Place dough in a greased bowl, turning to coat all sides. Cover with a damp towel and let rise in a warm place for 1½-2 hours until doubled in size. The dough should feel pillowy and spring back slowly when poked.
- Prepare the Filling: While dough rises, beat cream cheese and butter until light and fluffy, about 3 minutes. Mix in brown sugar, cinnamon, nutmeg, salt, and vanilla until well combined. Set aside at room temperature.
- Roll and Fill: Turn risen dough onto a lightly floured surface. Roll into a 20×14-inch rectangle, about ¼-inch thick. Spread cream cheese filling evenly over dough, leaving a 1-inch border along one long edge.
- Form the Rolls: Starting from the long edge opposite the border, tightly roll the dough into a log. Pinch seam to seal. Using a sharp knife or dental floss, cut into 12 equal pieces, each about 1½ inches thick.
- Second Rise: Arrange rolls in a greased 9×13-inch baking dish, leaving space between each. Cover and let rise for 45-60 minutes until puffy and rolls are touching.
- Bake: Preheat oven to 350°F. Bake rolls for 25-30 minutes until golden brown and internal temperature reaches 190°F. If browning too quickly, tent with foil.
- Make the Glaze: While rolls bake, beat cream cheese and butter until smooth. Gradually add powdered sugar, then cream and vanilla. Beat until fluffy and spreadable.
- Finish: Remove rolls from oven and let cool for 10 minutes. Spread half the glaze over warm rolls, allowing it to melt into crevices. Serve with remaining glaze on the side.
Recipe Notes
- Prep Time: 45 minutes (plus rising time)
- Rising Time: 2½-3 hours total
- Bake Time: 25-30 minutes
- Total Time: About 4 hours
- Yield: 12 large rolls
- Calories: 485 per roll
The Secret Behind Hawaiian Sweet Dough
The magic of King’s Hawaiian bread lies in its unique combination of ingredients that create an incredibly soft, slightly sweet, and utterly addictive texture. Traditional Hawaiian sweet bread gets its characteristic flavor from pineapple juice—not enough to taste distinctly tropical, but just enough to add a subtle sweetness and help create that signature tender crumb.
The science is fascinating: pineapple juice contains enzymes that partially break down gluten strands, resulting in a more tender dough. Combined with eggs and butter, this creates a brioche-like richness that sets these rolls apart from standard cinnamon rolls. The honey adds not just sweetness but moisture retention, keeping the rolls soft for days.
Temperature control during dough making is crucial. The 110°F liquid temperature activates the yeast without killing it, while room temperature eggs and softened butter incorporate smoothly without shocking the dough. This attention to temperature creates the ideal environment for yeast activity and gluten development.
Mastering the Cream Cheese Filling
This isn’t just cinnamon sugar mixed with butter—the cream cheese transforms everything. By beating it with butter until fluffy, we’re incorporating air that creates a lighter filling that won’t weigh down the delicate dough. The cream cheese also adds tang that balances the sweet dough and provides richness that seeps into every layer as the rolls bake.
The key to even distribution is having your cream cheese filling at room temperature. Cold filling tears the soft dough, while overly warm filling can leak out during rolling. That perfect spreadable consistency ensures every bite has the ideal ratio of dough to filling.
Don’t skip the nutmeg—while cinnamon is the star, that hint of nutmeg adds complexity that elevates these from good to extraordinary. The combination mimics the warm spice notes found in traditional Hawaiian desserts.
Rolling and Shaping Techniques
Achieving bakery-perfect spirals requires technique and patience. When rolling out your dough, work from the center outward, maintaining even thickness throughout. Those edges tend to be thicker, so pay special attention to rolling them thin enough to match the center.
The 20×14-inch rectangle isn’t arbitrary—this size creates rolls with 3-4 perfect spirals when cut to 1½-inch thickness. Too small and you’ll have dense rolls with few layers; too large and the dough becomes difficult to handle and may tear.
For the tightest spiral, start rolling from the long edge with steady, even pressure. After each full turn, gently pull the dough toward you to maintain tension. This prevents gaps between layers that can cause the rolls to unravel during baking.
The dental floss cutting method isn’t just a clever hack—it’s superior to knifing. Slide unflavored floss under the roll, cross the ends over the top, and pull to slice cleanly through. This prevents the compression that happens with knife cutting, preserving those beautiful spirals.
The Science of the Perfect Rise
Two rises are non-negotiable for texture and flavor development. The first rise develops the dough’s structure and begins fermentation, creating those complex flavors that distinguish artisan baking from quick breads. The second rise, after shaping, is where the magic happens—the rolls puff up, creating light, airy layers.
Your kitchen’s temperature dramatically affects rising times. The ideal temperature is 75-80°F. Too cold and you’ll wait hours; too hot and the outside rises faster than the inside, creating uneven texture. Create a proofing box by placing rolls in an off oven with the light on, or near a sunny window.
How do you know they’re ready? The dough should look puffy and feel light. Gently poke with a fingertip—if the indentation springs back slowly, leaving a slight impression, they’re perfect. If it bounces back immediately, give them more time. If it doesn’t spring back at all, they’re overproofed.
Baking for Perfection
That 350°F temperature is carefully chosen. Higher temperatures would brown the exterior before the center cooks through, especially problematic with enriched doughs. Lower temperatures would dry out the rolls before achieving that beautiful golden crust.
Position matters—center rack ensures even heat distribution. If your oven has hot spots, rotate the pan halfway through baking. Those edge rolls often brown faster, so consider covering just the corners with foil strips if needed.
The internal temperature check (190°F) is your insurance policy against doughy centers. Visual cues can deceive, especially with enriched doughs that brown quickly. A quick-read thermometer inserted into the center of a middle roll tells the true story.
Glaze Application Strategy
Timing the glaze application transforms good cinnamon rolls into phenomenal ones. That first application on warm rolls serves a purpose—the heat melts the glaze, allowing it to seep into every crevice and layer. This creates pockets of cream cheese sweetness throughout, not just on top.
The consistency matters too. Too thick and it sits on top like frosting; too thin and it runs off. You want something between honey and peanut butter—fluid enough to flow but thick enough to cling. Adjust with cream or powdered sugar as needed.
That reserved glaze isn’t just for heavy-handed sweet tooths. It allows customization—some prefer a light coating while others want their rolls swimming in glaze. It also provides a fresh burst of flavor contrast against the warm, spiced rolls.
Make-Ahead Strategies
These rolls are perfect for special occasions because they’re so make-ahead friendly. After cutting and placing in the pan, cover tightly with plastic wrap and refrigerate overnight. The cold retards yeast activity, creating a slow rise that develops even more complex flavors.
Morning baking requires planning—remove rolls from refrigeration 1-1½ hours before baking. They need to come to room temperature and complete their rise. They’re ready when they look puffy and pass the poke test.
For longer storage, freeze unbaked rolls after the first rise. Thaw overnight in the refrigerator, then proceed with shaping, second rise, and baking. The texture remains remarkably close to fresh-made.
Flavor Variations
Tropical Paradise: Add ½ cup toasted coconut and 2 tablespoons lime zest to the filling. Top glaze with toasted coconut and crushed macadamia nuts.
Maple Bacon: Replace brown sugar with maple sugar in filling. Top baked rolls with crispy bacon pieces and maple glaze.
Orange Cream: Add 2 tablespoons orange zest to dough and filling. Replace some glaze liquid with fresh orange juice.
Chocolate Haupia: Spread a thin layer of Nutella before the cinnamon filling. Top with coconut cream glaze.
Caramel Apple: Add 1 cup finely diced apples (tossed with cinnamon) to filling. Drizzle with caramel sauce.
Troubleshooting Common Issues
Dense, Heavy Rolls: Usually from too much flour or insufficient kneading. The dough should be slightly sticky but manageable. Resist adding excess flour during kneading.
Filling Leaked Out: Either overfilled or rolled too loosely. One cup of filling is maximum for this dough amount. Maintain tension while rolling.
Uneven Baking: Your oven likely has hot spots. Rotate the pan halfway through and consider an oven thermometer to verify temperature accuracy.
Dry Rolls: Overbaked or too much flour. Check at 25 minutes—the tops should be golden but not dark brown. Store covered to prevent moisture loss.
Didn’t Rise Properly: Check yeast expiration date and liquid temperature. Too hot kills yeast; too cool won’t activate it. The pineapple juice should feel comfortably warm on your wrist.
Storage and Reheating
Store glazed rolls in an airtight container for up to 3 days at room temperature. The high sugar and fat content keeps them moist longer than standard bread. For longer storage, refrigerate up to a week.
Reheating brings back that fresh-baked magic. Microwave individual rolls for 15-20 seconds, or warm in a 300°F oven for 5 minutes. For a crispy exterior, toast split rolls in a skillet with butter.
Never store in the refrigerator without proper wrapping—the dry environment stales bread faster. Double-wrap in plastic wrap then foil, or use an airtight container.
Final Thoughts
These King’s Hawaiian Cream Cheese Cinnamon Rolls represent the pinnacle of breakfast indulgence. The tropical sweetness of the Hawaiian-style dough, the warm spice of cinnamon cream cheese filling, and that luscious glaze create layers of flavor and texture that standard cinnamon rolls simply can’t match. Yes, they require time and patience, but the result—pillowy soft rolls with perfect spirals and complex flavors—justifies every minute. Make them once for a special occasion, and they’ll become the most requested recipe in your repertoire.